Listen, I've stared at more floating discs and scary laser grids on Penacony than I've had hot dinners. If you’ve been pulling your hair out over those Bubble Pinball puzzles in Hanu's Prison Break, you’ve come to the right place. Back in 2024 when this permanent event dropped, I swear I lost a few brain cells trying to navigate those psychedelic mazes. Fast forward to 2026, and I’m still the go-to guy in my friend group whenever someone screams “What the heck do I rotate next?!” So grab a cup of whatever keeps you sane, and let’s break this down, nice and easy. I’ll walk you through every single puzzle from the Shallow Dreamscape to the absolute madness of Deep Dreamscape – all in plain English, with zero jargon and a healthy dose of "I survived, so can you."
Shallow Dreamscape: The Warm-Up Act
Before you can even think about the deep end, you gotta get through two Shallow stages. Think of them as the tutorial, but don't snooze – they teach you the basics you’ll need later when things get nutty.
Difficulty I – A Piece of Cake 🍰
This one’s literally designed for your grandma to solve. You start off with a Pinball machine on the left and a laser beam that’s itching to bounce around. The trick? Activate the disc nearest to the Pinball on the left, then hit the second one. Before you activate the third disc, give it a single rotation so the beam heads where it’s supposed to. Boom. Path complete. If you mess this up, I might judge you a little.
Difficulty II – Follow That Laser! 🔍
Here’s where they start messing with your head. When the puzzle begins, watch the laser like a hawk, but completely ignore the very first disc it touches. I know, it feels wrong, like skipping a free sample. Instead, activate the second disc the laser passes through, and then just keep chain-activating every next disc the beam hits. After the third disc is on, you’ll spot a rogue one that needs a single rotation to connect the final dot. Done and dusted.
Deep Dreamscape: Where Sanity Goes to Die
Congratulations, you’ve unlocked the soul-crushing part. Five more difficulties, now with limited energy. That means you can’t just go around flipping every disc like a maniac – every activation eats up a move, and you’ve got to reach at least one middle stop Pinball machine to recharge. It’s like a budget meeting, but with lasers. Let’s power through.
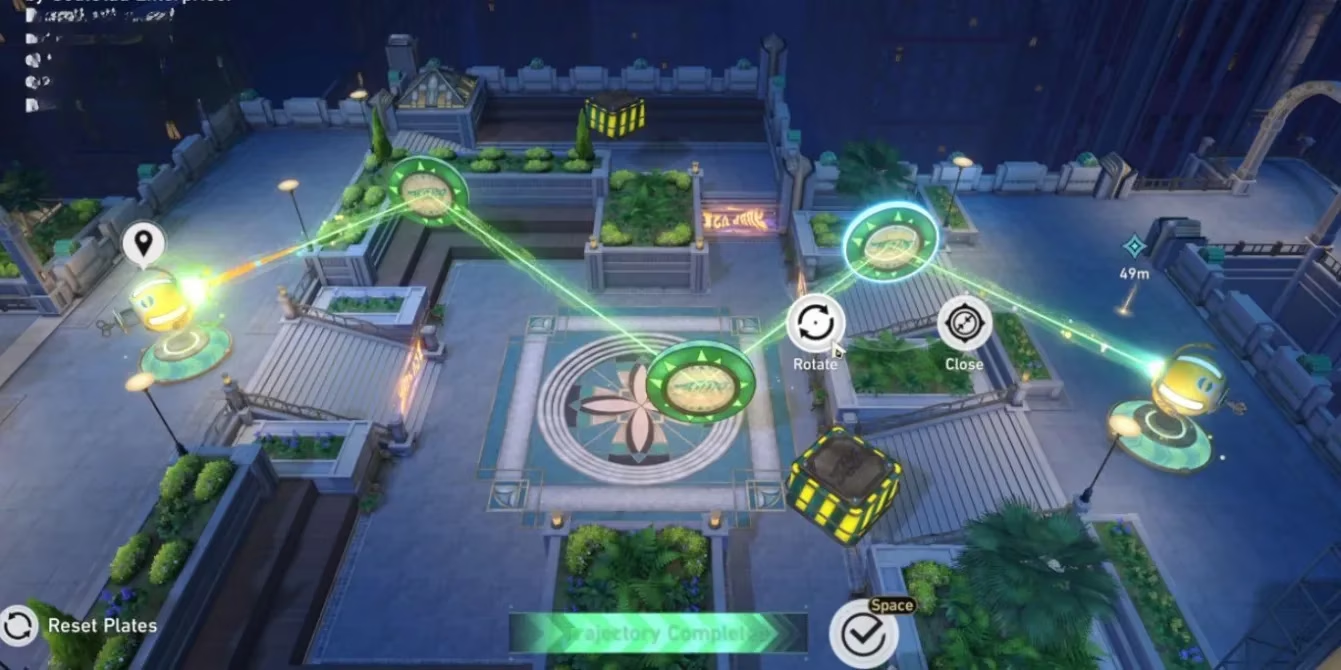
Difficulty I – Two Phases, One Brain Cell
Spotting the route to the main Pinball is easy, but executing it? That’s the rub. First, activate the bottom disc and the right-hand disc on the top row. Aim the laser at the Pinball machine perched up top so you can warp there as a midpoint. Once you’re inside that new machine, turn off the two discs you just activated (yes, it’s a reset party) and turn on all the rest. Now rotate the disc closest to your current machine so it points straight at the final goal. If you blinked, here’s a recap: first half is setup, second half is a clever switch-a-roo.
Difficulty II – The Great Swap Meet
This puzzle is a disc fiesta, and it almost broke me the first time. Phase one is straightforward: just turn on the discs that the laser passes through, one after another, for four activations. That’ll land you in a cozy middle stop. Now comes the bit that makes you go “Wait, what?” – climb back into the Pinball and flip every disc to its opposite state. Activated? Turn it off. Off? Turn it on. It’s like a mirror universe. After that, you’ll notice two discs that need a tiny rotation to guide the laser home. Easy once you stop overthinking.
Difficulty III – Obstacle Course of Doom
No middle stop here, so no safety net. You’ve got to snake the laser around a bunch of solid blocks that eat beams for breakfast. Start by turning on the discs the laser touches for three moves. On the third disc, rotate it so it reflects the beam upward to the top disc. From there, just keep activating the lit-up discs and throw in one more spin further down the line. It’s like a game of hot potato, but the potato is a deadly laser and you’re playing it with obstacles.
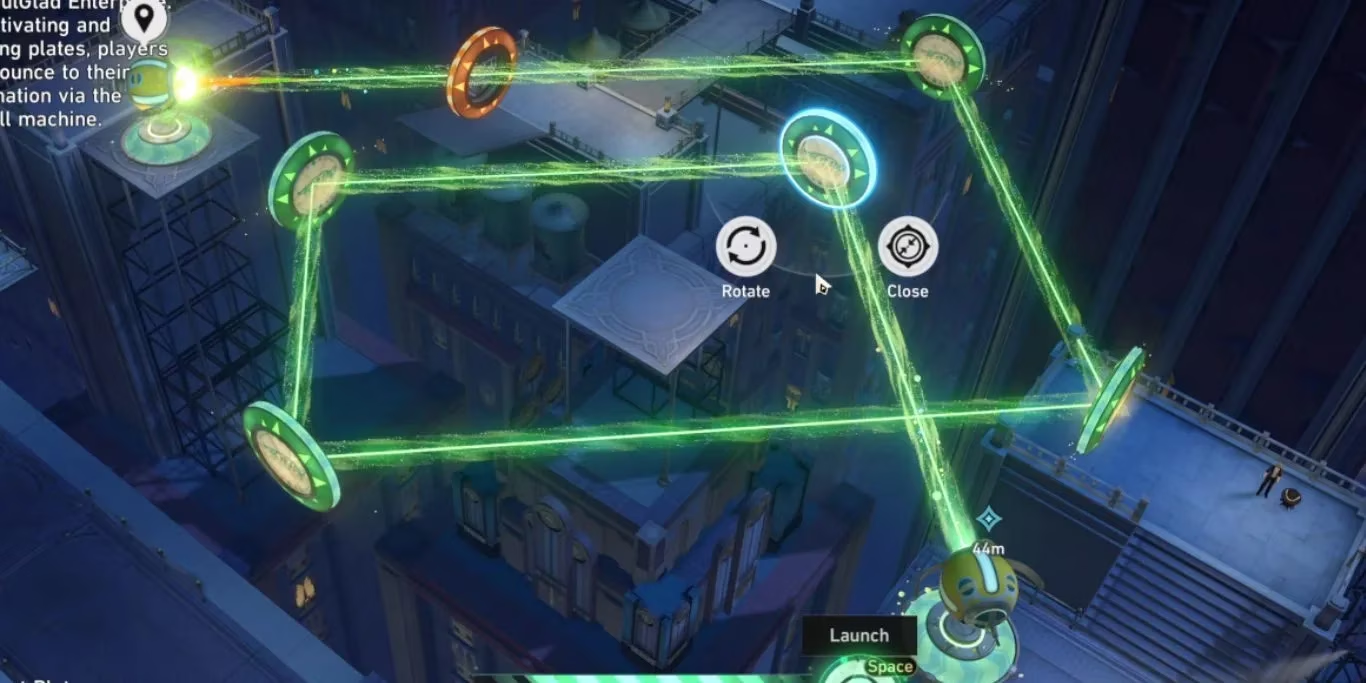
Difficulty IV – Double the Trouble
This one gives you two middle stops, which is a blessing and a curse. To hit the first checkpoint, simply turn on the discs the laser passes through, but rotate the second disc you activate once – that’ll bend the path toward the bottom-right machine. After you materialize there, start phase two by turning on the first disc the beam meets and rotating it. Then you can activate three more discs straight as an arrow to reach the glorious finish.
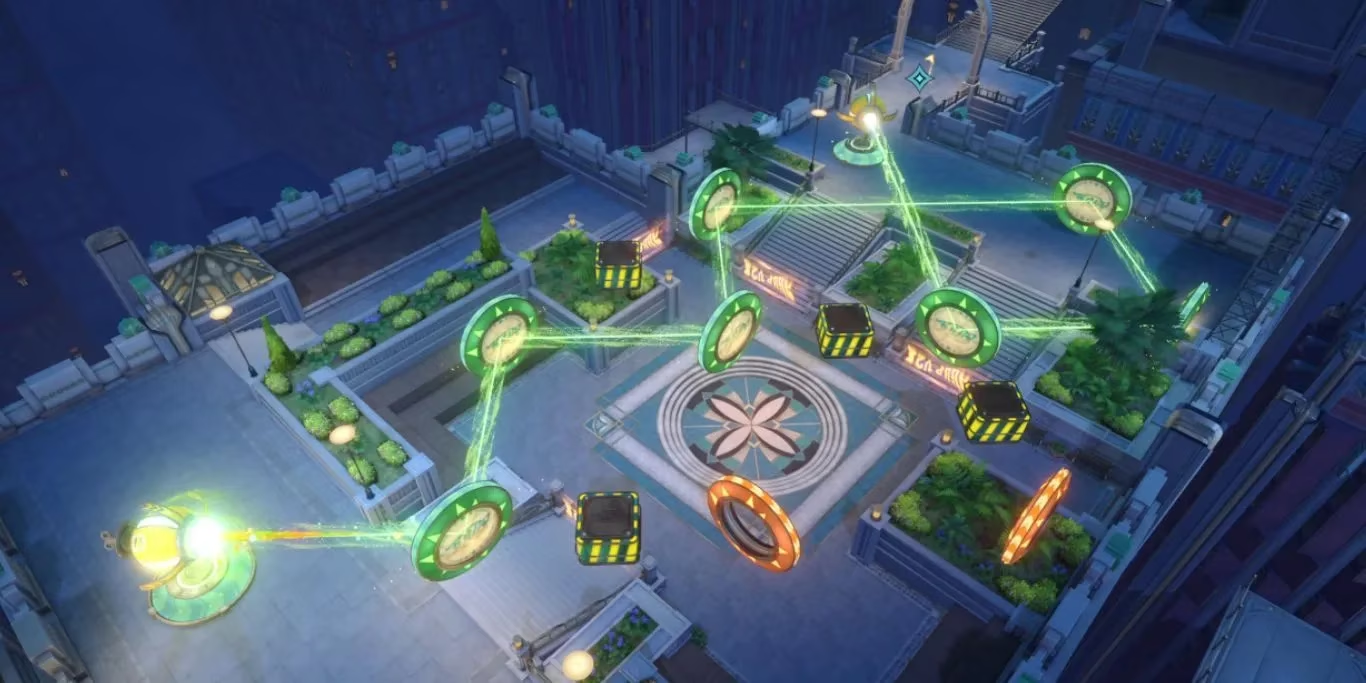
Difficulty V – The Grand Finale 🎉
The last hurdle looks like someone vomited discs all over the screen. But stick to the plan: turn on five discs that the laser passes through, and rotate the fifth one once. Next, skip over the two middle discs entirely (they’re a trap, I swear) and turn on the top-most one. After that, skip another disc and hit the top-right one. Finally, activate three more discs in sequence and you’ll be staring at the victory pop-up. It’s like a weird dance routine, but once you memorize the steps, you’ll breeze through.
So there you have it – every single Bubble Pinball solution in Hanu’s Prison Break, served with a side of hard-earned wisdom. The Stellar Jades are delicious, and the bragging rights even better. Next time someone calls these puzzles impossible, just smile knowingly. You’ve got the map. Now go forth and bounce.
Insights are sourced from OpenCritic, underscoring how standout puzzle mechanics are often judged on clarity, feedback, and how well they ramp difficulty—exactly the curve you feel in Hanu’s Prison Break Bubble Pinball stages, where early Shallow Dreamscape layouts teach disc activation/rotation fundamentals before Deep Dreamscape adds tighter move economy and checkpoint routing that rewards deliberate, readable laser-path planning.